Advertisement

Stick It Right: The Ultimate Guide to Perfect Vehicle Signage Placement for Your Business

In today’s fast-paced world, delivery service businesses are booming. From food couriers to parcel logistics, the sight of a branded delivery vehicle is now part of our everyday lives. But here’s the thing — many delivery businesses are missing a huge marketing opportunity by not optimizing their vehicle signage.

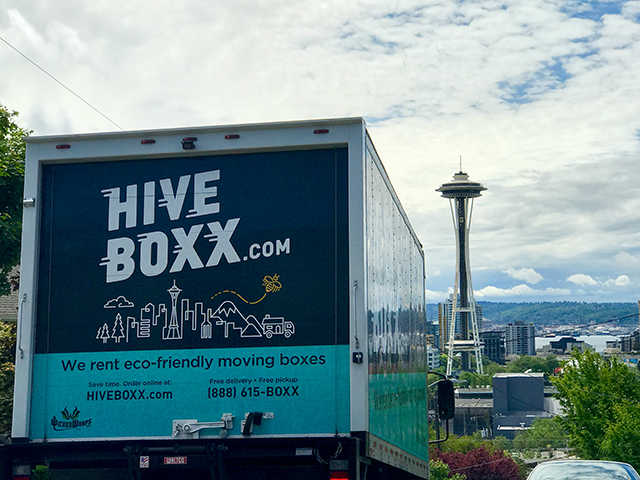
Vehicle signage isn’t just about slapping a logo on the side of a van and calling it a day. It’s a mobile billboard that advertises your brand wherever your vehicle goes. To get the most out of it, you need to be smart about what you display and where you place it. This guide walks you through exactly how to do that, with a special focus on delivery businesses using stickers for vehicle branding.


Why Vehicle Signage Matters for Delivery Services

When you run a delivery business, your vehicle is on the road more than most. It’s parking in driveways, pulling up to homes, navigating business districts, and stopping in public areas where thousands of eyes can spot it. This constant visibility means free advertising — but only if your signage is eye-catching, legible, and professionally placed.

Proper placement not only enhances brand recognition but also makes your business look legitimate and trustworthy. It can even boost customer confidence when your driver shows up at a doorstep in a professionally branded vehicle.


First Things First: What Do You Need?

Before diving into placement, here’s a checklist of what you’ll need for effective signage application:

  1. High-quality vinyl stickers for vehicle use
  2. Your brand’s logo, tagline, and contact details
  3. A clean and dry surface on the vehicle
  4. Measurement tools (tape measure, level, masking tape)
  5. Squeegee or plastic card for smooth application
  6. Optional: A professional installer (recommended for full wraps or large decals)

Now that your tools are in order, let’s get into where and how to place your signage for maximum impact.


Top 5 Signage Zones for Delivery Vehicles

Each part of your vehicle serves a purpose — visually and functionally. Here are the prime locations you should focus on, and why:


1. Driver and Passenger Side Doors

Why it works:
This is a no-brainer. Side doors are the most visible parts of your vehicle in traffic and when parked curbside. Since your vehicle will often be seen from the side — either in driveways or on the road — this is where your logo and business name should go first.

What to place:

  • Business logo
  • Company name
  • Optional: Phone number or website
  • QR code for app-based orders (bonus tip)

Placement tip:
Center the decal horizontally on the door panel. Use masking tape to pre-position the sticker for vehicle alignment and make sure it’s perfectly straight.


2. Rear Windows or Tailgate

Why it works:
When you’re stuck in traffic or parked in a busy lot, the back of your vehicle gets the most eyes. This is your chance to leave a lasting impression.

What to place:

  • Slogan or tagline
  • Website URL or phone number
  • Social media handles (if readable)

Placement tip:
Use perforated window film if applying to glass, so the driver still has visibility. Position your info high enough to avoid it being blocked by license plates or bumpers.


3. Rear Quarter Panels

Why it works:
This often-overlooked area near the back wheel is surprisingly effective for secondary messaging — especially when your vehicle is parked side-on.

What to place:

  • Service offering (“Fast food delivery,” “Express couriers,” etc.)
  • Coverage area (“Serving Sydney metro,” etc.)
  • Business hours or response time

Placement tip:
Keep the messaging concise and bold. Use simple fonts and contrasting colors so it’s readable at a glance.


4. Front Bonnet (Hood)

Why it works:
While not as visible on the move, the hood can stand out when parked nose-out in driveways or lots. It’s ideal for reinforcing branding.

What to place:

  • Just the logo, clean and centered
  • Optional: Tagline in smaller text beneath

Placement tip:
Use symmetrical placement to center the design. Avoid cluttering this space — it should complement, not compete, with side or rear signage.


5. Roof (Optional, but Clever)

Why it works:
If your delivery vehicle operates in areas with tall buildings, like city centers or apartment blocks, a rooftop sign is genius. Pedestrians and people looking out of windows can see your brand even when the car is parked below.

What to place:

  • Brand logo
  • Delivery icon or “On Delivery” message

Placement tip:
This can be a decal or a 3D magnetic rooftop sign (like those used by pizza delivery vehicles).


Design Do’s and Don’ts

Do:

  • Use large, bold fonts
  • Stick to 2–3 colors that contrast with your vehicle
  • Include your website or a phone number
  • Keep it simple: one clear message per zone
  • Use UV and weather-resistant stickers for vehicle durability

Don’t:

  • Overcrowd your design
  • Use fancy fonts that are hard to read
  • Forget to clean and prep the surface first
  • Place text over curves or handles that distort it
  • Ignore local signage regulations (check your area)

DIY vs. Professional Installation

For small decals, a DIY approach using quality stickers for vehicle is perfectly acceptable. But for large wraps or more complex applications, hiring a professional ensures longevity and a polished look.

Pros will also know how to apply decals without air bubbles, handle curves properly, and use the right materials for your climate (especially important in hot or rainy areas).


Maintaining Your Signage

  • Wash regularly with a mild detergent
  • Avoid pressure washing the edges of your decals
  • Inspect for peeling or fading every few months
  • Replace damaged signage to maintain a professional image

Final Thoughts: Mobile Marketing That Works While You Work

Your delivery vehicle isn’t just a tool — it’s a moving advertisement that can generate leads every time it hits the road. Strategic placement of your stickers for vehicle branding can turn every traffic jam, customer delivery, or petrol stop into a marketing opportunity.

By following this guide and placing your signage in the right locations, you’ll boost your brand’s visibility, appear more professional to clients, and make the most of every kilometer your business covers.

So stick it right — and let your vehicle do the talking. Use this weblink to access our website and look for our car stickers that we have made.
Advertisement

Mastering DIY Paint Correction: Expert Tips for a Flawless Finish at Home

Automotive enthusiasts know the pride and joy that comes with a gleaming, flawless car finish. Over time, however, even the most meticulously maintained vehicles can develop imperfections. This is where automotive paint correction comes into play. Paint correction is the process of restoring and rejuvenating the paintwork of a vehicle, primarily by removing surface imperfections that dull, oxidize, or otherwise degrade the finish. For those who love the satisfaction of a DIY project, mastering paint correction at home is not only possible but can also be incredibly rewarding.

Understanding Paint Imperfections

Before diving into the process, it’s essential to understand what types of imperfections you might encounter. Common issues include swirl marks, water spots, oxidation, light scratches, and etching from bird droppings or tree sap. These imperfections occur for various reasons, such as improper washing techniques, environmental factors, and general wear and tear. Identifying the type and severity of the imperfections on your vehicle’s paint will help you choose the right approach and products for correction.

Essential Tools and Products for DIY Paint Correction

To achieve a professional-grade finish at home, you’ll need the right tools and products. Here’s a basic list to get you started:

Tools:

  1. Dual Action Polisher: A DA polisher is user-friendly and effective for beginners. It reduces the risk of paint damage while providing excellent results.
  2. Polishing Pads: Different pads are required for various stages of correction. Foam pads are typically used for polishing and finishing, while microfiber pads are better for cutting through severe imperfections.
  3. Microfiber Towels: High-quality, lint-free microfiber towels are essential for wiping off polish residue and ensuring a clean finish.
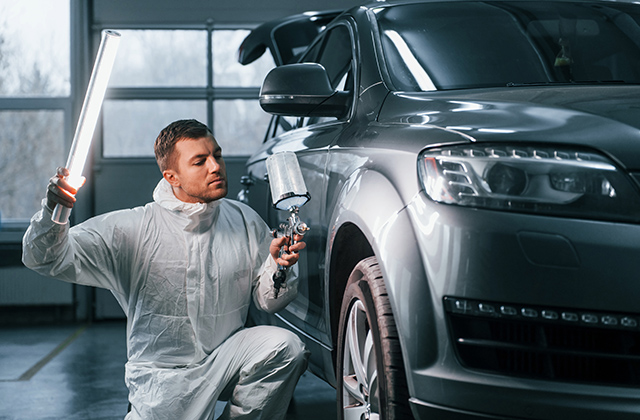
  4. Inspection Light: A good inspection light helps you see imperfections clearly and track your progress.
  5. Detailing Clay Bar: Used to remove contaminants from the paint surface before polishing.

Products:

  1. Compound: A cutting compound is used to remove severe imperfections. It has more abrasive particles compared to polish.
  2. Polish: Polishing products are less abrasive than compounds and are used to refine the paint surface after compounding.
  3. Sealant or Wax: After correcting the paint, protect your work with a high-quality sealant or wax to enhance the shine and protect the finish.

Step-by-Step Guide to DIY Paint Correction

Step 1: Thorough Wash and Decontamination

Start by washing your car thoroughly to remove all dirt, grime, and loose contaminants. Use a high-quality car shampoo and wash mitt to avoid introducing new scratches. After washing, use a detailing clay bar with a lubricant to remove any remaining embedded contaminants. This step ensures a clean surface for the paint correction process.

Step 2: Inspect the Paint

Use an inspection light to examine the paint closely. Identify the types of imperfections and their locations. This inspection will guide you in selecting the appropriate pad and product combination for each area.

Step 3: Test Spot

Before tackling the entire vehicle, it’s wise to perform a test spot. Choose a small, inconspicuous area and test different combinations of pads and products. This step helps you determine the least aggressive method that achieves the desired results. Remember, the goal is to remove the least amount of paint necessary to correct the imperfections.

Step 4: Compounding

Attach the cutting pad to your DA polisher and apply a small amount of compound. Spread the compound evenly over a 2×2 foot section of the paint. Turn on the polisher at a low speed to spread the product, then increase the speed and use slow, overlapping passes. Keep the pad flat against the surface and avoid excessive pressure. After several passes, wipe off the residue with a microfiber towel and inspect the area. Repeat as necessary until the imperfections are removed.

Step 5: Polishing

Once the compounding stage is complete, switch to a polishing pad and apply the polish. Polishing refines the paint surface and enhances the gloss. Use the same technique as compounding, but with less aggressive products and pads. Wipe off the residue and inspect the surface. You should see a noticeable improvement in clarity and shine.

Step 6: Final Inspection and Touch-Ups

After polishing, thoroughly inspect the entire vehicle under different lighting conditions. Touch up any areas that need additional correction. Patience is key during this stage to ensure a uniform, flawless finish.

Step 7: Protecting the Finish

Once you’re satisfied with the correction, it’s time to protect your work. Apply a high-quality sealant or wax to the entire vehicle. This step not only enhances the shine but also provides a protective layer against environmental contaminants and UV rays. Follow the manufacturer’s instructions for application and curing times.

Step 8: Maintenance

Maintaining your newly corrected paint is crucial for preserving the results. Implement proper washing techniques, such as the two-bucket method and using a grit guard, to minimize the risk of introducing new scratches. Regularly apply a maintenance sealant or wax to keep the paint protected and looking its best.

Expert Tips for a Successful DIY Paint Correction

  1. Work in a Controlled Environment: If possible, work indoors or in a shaded area to avoid direct sunlight and contaminants.
  2. Stay Patient: Paint correction is a meticulous process that requires time and patience. Rushing can lead to mistakes and subpar results.
  3. Use Quality Products: Invest in high-quality pads, compounds, polishes, and protective products. Quality materials yield better results and are often easier to work with.
  4. Keep Pads Clean: Clean your pads regularly during the process to prevent product buildup and ensure consistent performance.
  5. Avoid Over-Polishing: Polishing removes a thin layer of clear coat. Excessive polishing can damage the paint, so only correct as much as necessary.
  6. Educate Yourself: There are numerous online resources, forums, and tutorials available for learning about automotive paint correction. Take advantage of these to build your knowledge and confidence.

Conclusion

Mastering DIY paint correction at home is an achievable goal with the right tools, products, and techniques. By understanding the types of paint imperfections, using high-quality materials, and following a methodical process, you can restore your vehicle’s paint to a stunning, flawless finish. Not only will this enhance the aesthetic appeal of your car, but it will also provide a deep sense of satisfaction and pride in your work. With patience and practice, you’ll become proficient in the art of automotive paint correction, enjoying the rewards of a showroom-worthy finish on your cherished vehicle. Check my source of paint correction company who provides realistic approach.

Advertisement

How a PR Agency’s Strategic Communications Revolutionized the Automotive Industry

In today’s fast-paced automotive industry, where competition is fierce and consumer preferences are constantly evolving, the role of strategic communications cannot be overstated. From launching new models to managing crisis situations, effective communication can make or break a car company’s reputation and bottom line. This is where the expertise of a PR agency, coupled with the insights of an investor relations consultant, becomes invaluable.

The automotive industry has seen its fair share of challenges in recent years, from technological disruptions to changing consumer expectations. In such a dynamic landscape, car companies need to stay ahead of the curve to remain relevant and competitive. This is where strategic communications come into play. By crafting compelling narratives and engaging with stakeholders effectively, PR agencies can help car companies navigate these challenges and seize opportunities for growth.

One such example of the transformative power of strategic communications is evident in the success story of a leading car manufacturer. Faced with stiff competition and a shifting market landscape, the company turned to a PR agency with a track record of driving results. Working closely with an investor relations consultant, the agency developed a comprehensive communication strategy that focused on enhancing the company’s reputation and building trust with investors and consumers alike.

At the heart of this strategy was a commitment to transparency and authenticity. The PR agency worked closely with the company’s leadership team to identify key messages and narratives that resonated with stakeholders. Through targeted media outreach, thought leadership initiatives, and digital engagement campaigns, the company was able to amplify its brand voice and differentiate itself in a crowded marketplace.

One of the key areas where the PR agency’s expertise proved invaluable was in managing investor relations. With the help of the investor relations consultant, the company was able to communicate its financial performance and strategic vision effectively to the investment community. By providing timely and accurate information, the company was able to build credibility and trust with investors, ultimately driving shareholder value.

But strategic communications is not just about managing external perceptions; it’s also about fostering a culture of open communication internally. The PR agency worked closely with the company’s internal communications team to ensure that employees were aligned with the company’s messaging and goals. By keeping employees informed and engaged, the company was able to harness the collective power of its workforce and drive positive change from within.

Another critical aspect of the PR agency’s strategy was crisis management. In today’s hyper-connected world, a single misstep can quickly escalate into a full-blown crisis, damaging a company’s reputation and eroding consumer trust. Recognizing this risk, the PR agency worked proactively with the company to identify potential vulnerabilities and develop contingency plans. When a crisis did occur, the agency sprang into action, providing guidance and support every step of the way. Through swift and decisive action, the company was able to mitigate the damage and emerge stronger than ever.

In conclusion, the impact of a PR agency’s strategic communications on the automotive industry cannot be overstated. By crafting compelling narratives, managing investor relations, fostering internal alignment, and navigating crisis situations, PR agencies play a crucial role in helping car companies succeed in today’s competitive marketplace. As the automotive industry continues to evolve, the need for effective communication will only grow, making the partnership between car companies and PR agencies more important than ever. Visit website of ours to see the importance of strategic communications.